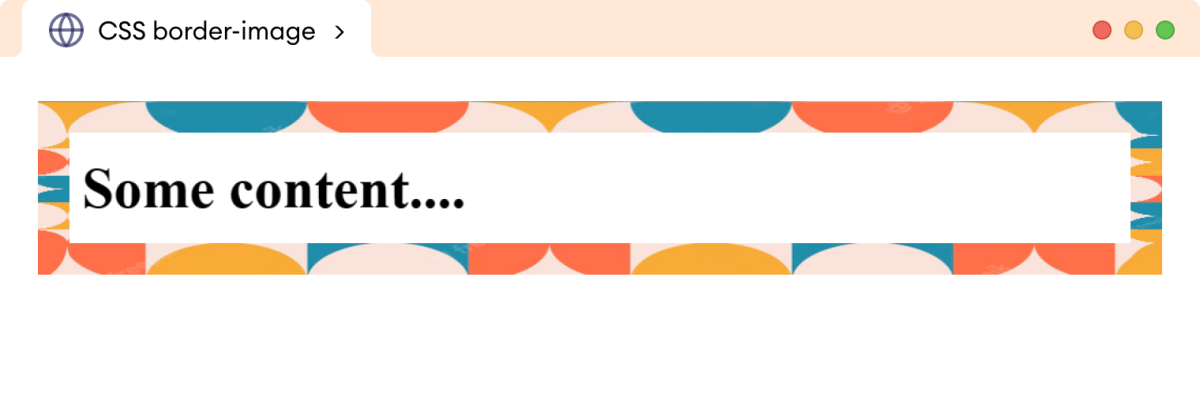
CSS border-image 属性将图像设置为元素的边框。例如,
h1 {
    border-image: url("pattern-image.png") 60;
}
浏览器输出

此处,border-image 属性将图像添加为 h1 元素的边框。
CSS border-image 语法
border-image 属性的语法如下:
border-image: source slice / width / outset repeat | initial | inherit;这里,
source:指定边框图像的 URLslice:指定用于切割图像边缘以作为边框的长度值width:指定边框图像的宽度outset:指定边框图像在边框框之外延伸的距离repeat:指定边框空间的分布方式,值为repeat、round和spaceinitial:将属性值设置为 none(默认值)inherit:继承其父级的属性值
示例:CSS border-image 属性
让我们看一个 border-image 属性的示例:
<!DOCTYPE html>
<html lang="en">

    <head>
        <meta charset="UTF-8" />
        <meta name="viewport" content="width=device-width, initial-scale=1.0" />
        <link rel="stylesheet" href="style.css" />
        <title>CSS border-image</title>
    </head>

    <body>
        <h1>Some content....</h1>
    </body>

</html>
h1 {
/* adds a solid border, necessary for border image */
border: solid;
/* image url | slice width | border-width */
border-image: url("https://img.freepik.com/free-photo/brown-square-texture_1194-7340.jpg?w=826&t=st=1686742674~exp=1686743274~hmac=58c8053259877149e055e29bb68430ee532cf0a897d7b84a50ede0aaa98a5a03")
50 / 20px;
/* adds 20px padding */
padding: 20px;
}浏览器输出

在上面的例子中:
border-image: border-image.png 20 / 20px repeat;创建带图像的边框,其中
border-image.png:指定边框图像的 URL50:指定从边框图像边缘切割的像素宽度20px:指定边框图像的宽度repeat:背景图像重复以填充边框宽度
注意:border-image 属性仅在 border-style 属性设置为 solid 时有效。
CSS border-image 属性工作原理
许多人对图像如何被切割作为边框感到困惑。边框的图像部分是通过 border-image 属性的 slice 值来切割的。
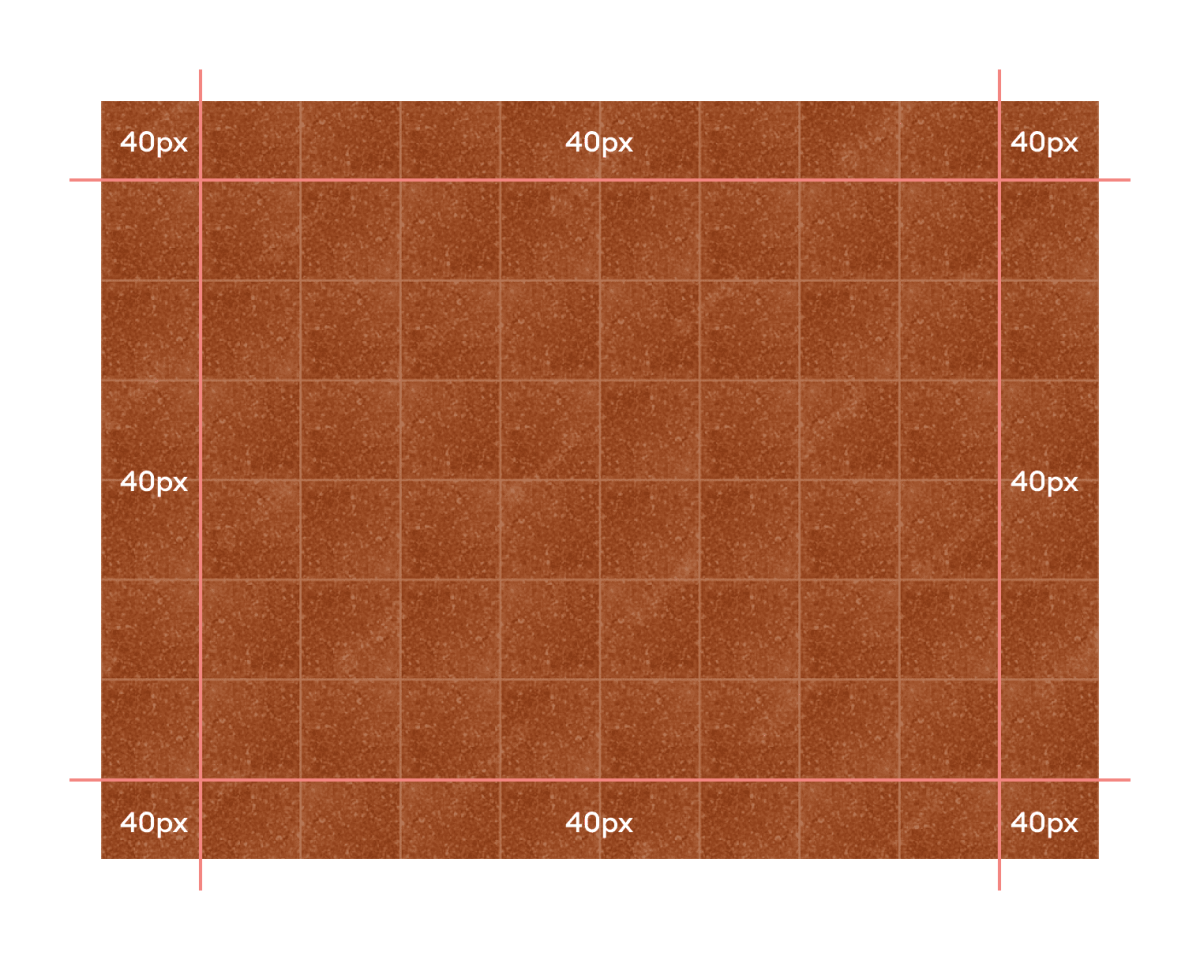
假设我们有一个 slice 值为 40,那么我们的图像将从图像的每个边缘切割 40px。
让我们看一下下面的图示:

这里,图像从边缘被切割到线条。边缘和线条之间的空间为 40px,这是指定的 slice 值。
这个提取的图像将适合 border-image 属性指定的 width 值。
提取的边框图像,
- 如果
slice值等于width值,则完全匹配。 - 如果
width值大于slice值,则会拉伸。 - 如果
width值小于slice值,则会收缩。
CSS border-image 与线性渐变
border-image 属性也接受任何类型的渐变来创建边框图像。例如,
<!DOCTYPE html>
<html lang="en">

    <head>
        <meta charset="UTF-8" />
        <meta name="viewport" content="width=device-width, initial-scale=1.0" />
        <link rel="stylesheet" href="style.css" />
        <title>CSS border-image</title>
    </head>

    <body>
        <p>Some content....</p>
    </body>

</html>
p {
/* border-width | border-style */
border: 20px solid;
/* linear-gradient | border-slice-width */
border-image: linear-gradient(to right, orange, red) 30;
padding: 12px;
}浏览器输出

在上面的例子中:
linear-gradient(to right, orange, red) 30;创建带线性渐变的边框,该渐变从渐变的边缘切割 30px。
CSS border-image 作为简写属性
border-image 简写属性允许我们在一个声明中指定所有与边框图像相关的属性。例如,
<!DOCTYPE html>
<html lang="en">

    <head>
        <meta charset="UTF-8" />
        <meta name="viewport" content="width=device-width, initial-scale=1.0" />
        <link rel="stylesheet" href="style.css" />
        <title>CSS border-image</title>
    </head>

    <body>
        <p>Some content....</p>
    </body>

</html>
p {
border-style: solid;
/* border-image-source | slice-width | border-width | outset-width | border-image-repeat */
border-image: url("https://img.freepik.com/free-photo/brown-square-texture_1194-7340.jpg?w=826&t=st=1686742674~exp=1686743274~hmac=58c8053259877149e055e29bb68430ee532cf0a897d7b84a50ede0aaa98a5a03")
60 / 20px / 5px repeat;
padding: 20px;
}浏览器输出

在上面的例子中:
border-image: url("pattern.png") 60 / 20px / 5px repeat;等同于:
border-image-source: url("pattern.png");
border-image-slice: 60;
border-image-width: 20px;
border-image-outset: 5px;
border-image-repeat: repeat;