CSS opacity 属性指定元素的透明度级别。例如,
img.second {
    opacity: 0.5;
}
浏览器输出

在这里,opacity: 0.5 将第二张图片的透明度设置为 0.5,这意味着该图片将是 50% 透明的。
CSS opacity 语法
opacity 属性的语法是,
opacity: number | initial | inherit;这里,
number: 设置从0.0(完全透明)到1.0(完全不透明)范围内的透明度级别initial: 将属性值设置为默认值(1.0)inherit:继承其父元素的属性值。
1.0 的透明度值相当于 100%。
注意:opacity 属性不仅会影响元素本身,还会影响其内部的任何子元素或内容。
CSS 背景颜色不透明度
有时我们需要为背景颜色设置一点透明度。例如,
<!DOCTYPE html>
<html lang="en">

    <head>
        <meta charset="UTF-8" />
        <meta name="viewport" content="width=device-width, initial-scale=1.0" />
        <link rel="stylesheet" href="style.css" />
        <title>CSS opacity</title>
    </head>

    <body>
        <div class="box box1"><h2>opacity: 1.0</h2></div>
        <div class="box box2"><h2>opacity: 0.7</h2></div>
        <div class="box box3"><h2>opacity: 0.3</h2></div>
        <div class="box box4"><h2>opacity: 0.1</h2></div>
    </body>

</html>
/* styles the div */
div.box {
height: 100px;
background-color: orange;
}
div.box1 {
opacity: 1;
}
div.box2 {
opacity: 0.7;
}
div.box3 {
opacity: 0.3;
}
div.box4 {
opacity: 0.1;
}浏览器输出

在上面的示例中,div 的透明度也影响了 h1 元素的文本。这使得文本难以阅读。
我们可以通过使用带有所需透明度的 RGBA 颜色值的 background-color 属性来解决这个问题。
让我们看一个例子,
<!DOCTYPE html>
<html lang="en">

    <head>
        <meta charset="UTF-8" />
        <meta name="viewport" content="width=device-width, initial-scale=1.0" />
        <link rel="stylesheet" href="style.css" />
        <title>CSS opacity</title>
    </head>

    <body>
        <div class="box box1"><h2>opacity: 1.0</h2></div>
        <div class="box box2"><h2>opacity: 0.7</h2></div>
        <div class="box box3"><h2>opacity: 0.3</h2></div>
        <div class="box box4"><h2>opacity: 0.1</h2></div>
    </body>

</html>
/* styles the div */
div.box {
height: 100px;
background-color: orange;
}
div.box1 {
/* equivalent opacity to 1; */
background-color: rgba(255, 165, 0, 1);
}
div.box2 {
/* equivalent opacity to 0.7; */
background-color: rgba(255, 165, 0, 0.7);
}
div.box3 {
/* equivalent opacity to 0.3; */
background-color: rgba(255, 165, 0, 0.3);
}
div.box4 {
/* equivalent opacity to 0.1; */
background-color: rgba(255, 165, 0, 0.1);
}浏览器输出

在这里,h1 元素的文本清晰可见,同时使用 RGBA 颜色值保持了背景颜色的先前透明度。
CSS 图片不透明度
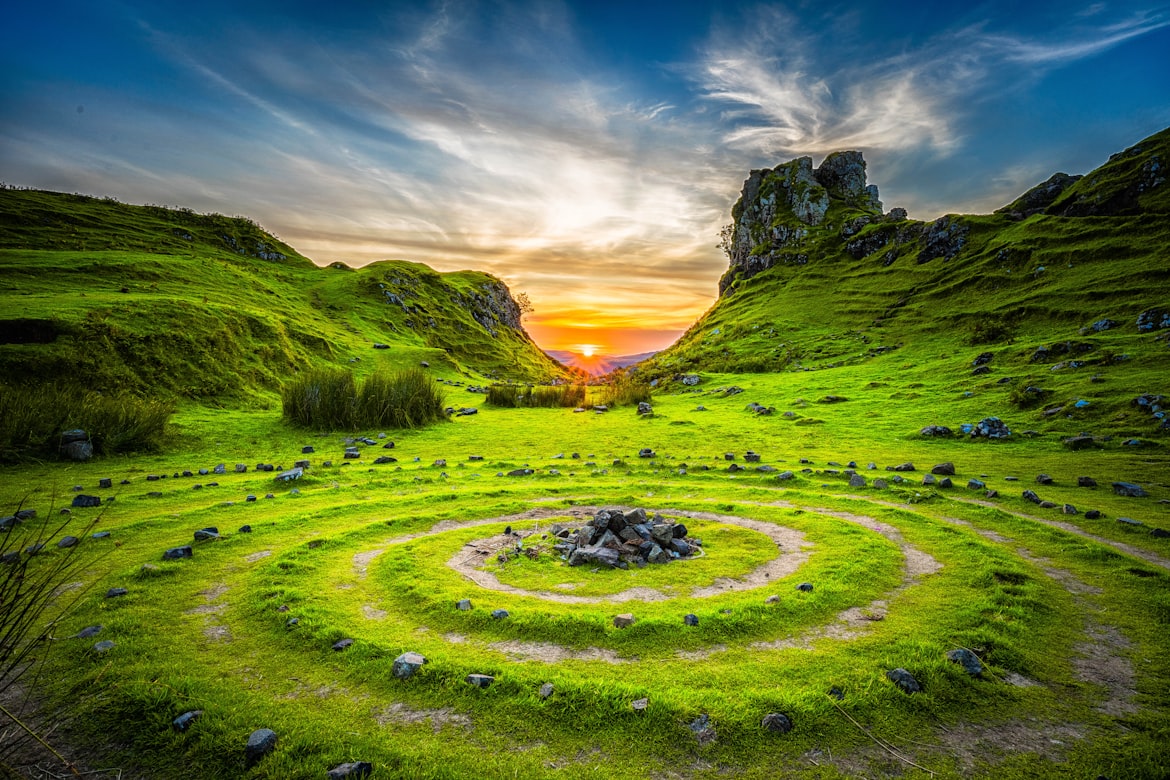
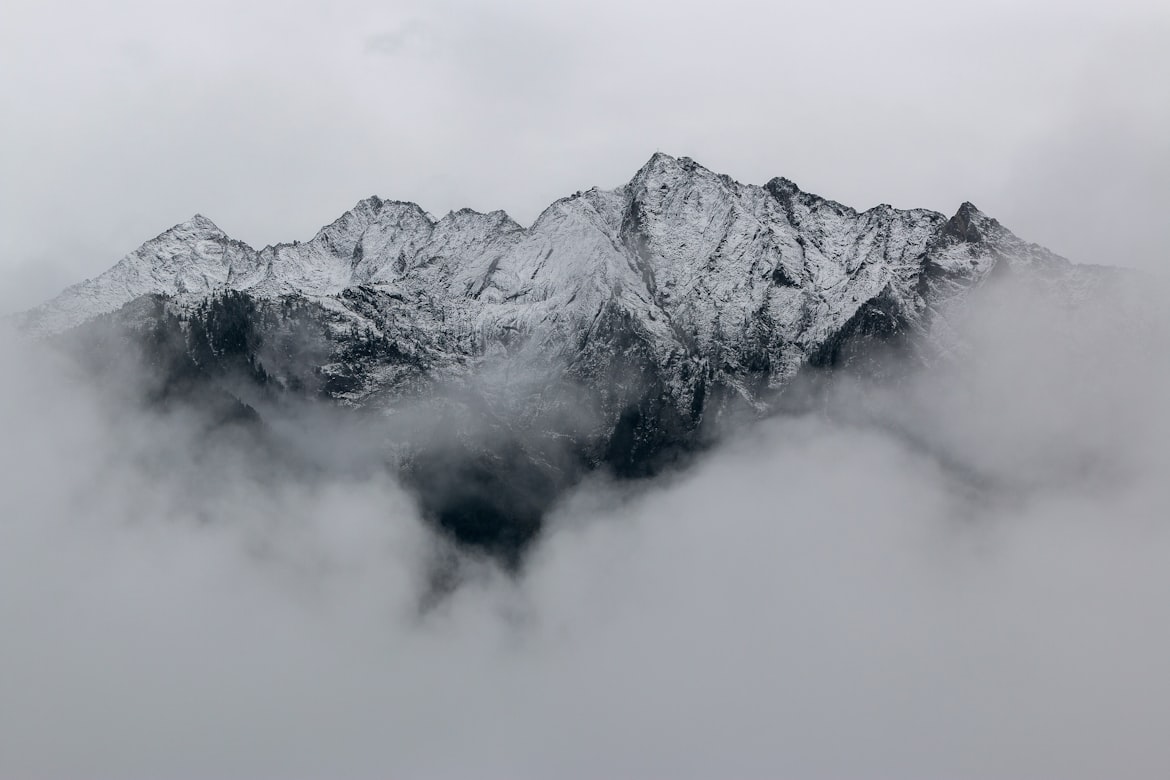
opacity 属性通常用于通过调整其透明度来创建图片的悬停效果。例如,
<!DOCTYPE html>
<html lang="en">

    <head>
        <meta charset="UTF-8" />
        <meta name="viewport" content="width=device-width, initial-scale=1.0" />
        <link rel="stylesheet" href="style.css" />
        <title>CSS opacity</title>
    </head>

    <body>
        <img
src="https://images.unsplash.com/photo-1472214103451-9374bd1c798e?ixlib=rb-4.0.3&ixid=MnwxMjA3fDB8MHxwaG90by1wYWdlfHx8fGVufDB8fHx8&auto=format&fit=crop&w=1170&q=80"
            alt="A warm sunset"
        />
        <img src="https://images.unsplash.com/photo-1505765050516-f72dcac9c60e?ixlib=rb-4.0.3&ixid=MnwxMjA3fDB8MHxwaG90by1wYWdlfHx8fGVufDB8fHx8&auto=format&fit=crop&w=1170&q=80"
            alt="Cloudy mountains"
        />

    </body>
</html>
img {
width: 350px;
margin: 8px;
/* sets the opacity to 0.6 (60%) */
opacity: 0.6;
}
/* sets the opacity to 1 (100%) on hovering image */
img:hover {
opacity: 1;
}浏览器输出